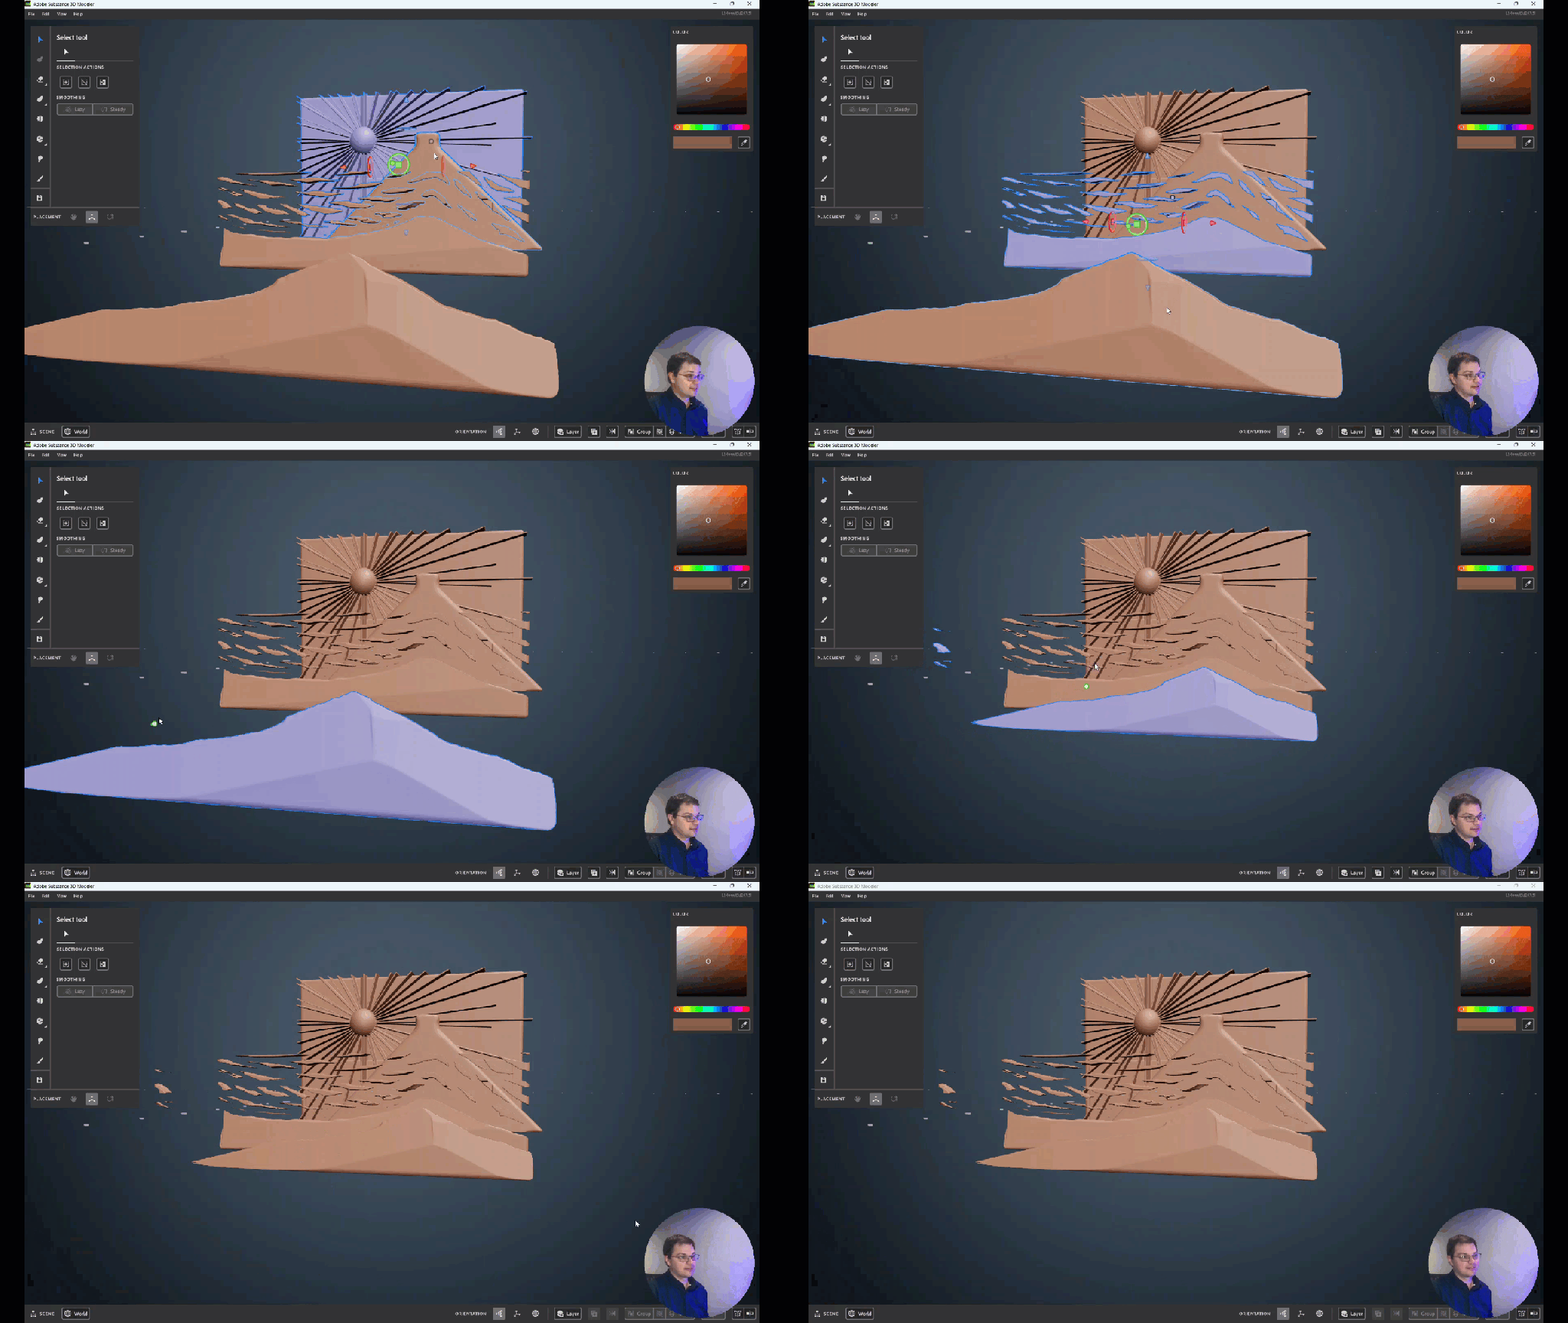
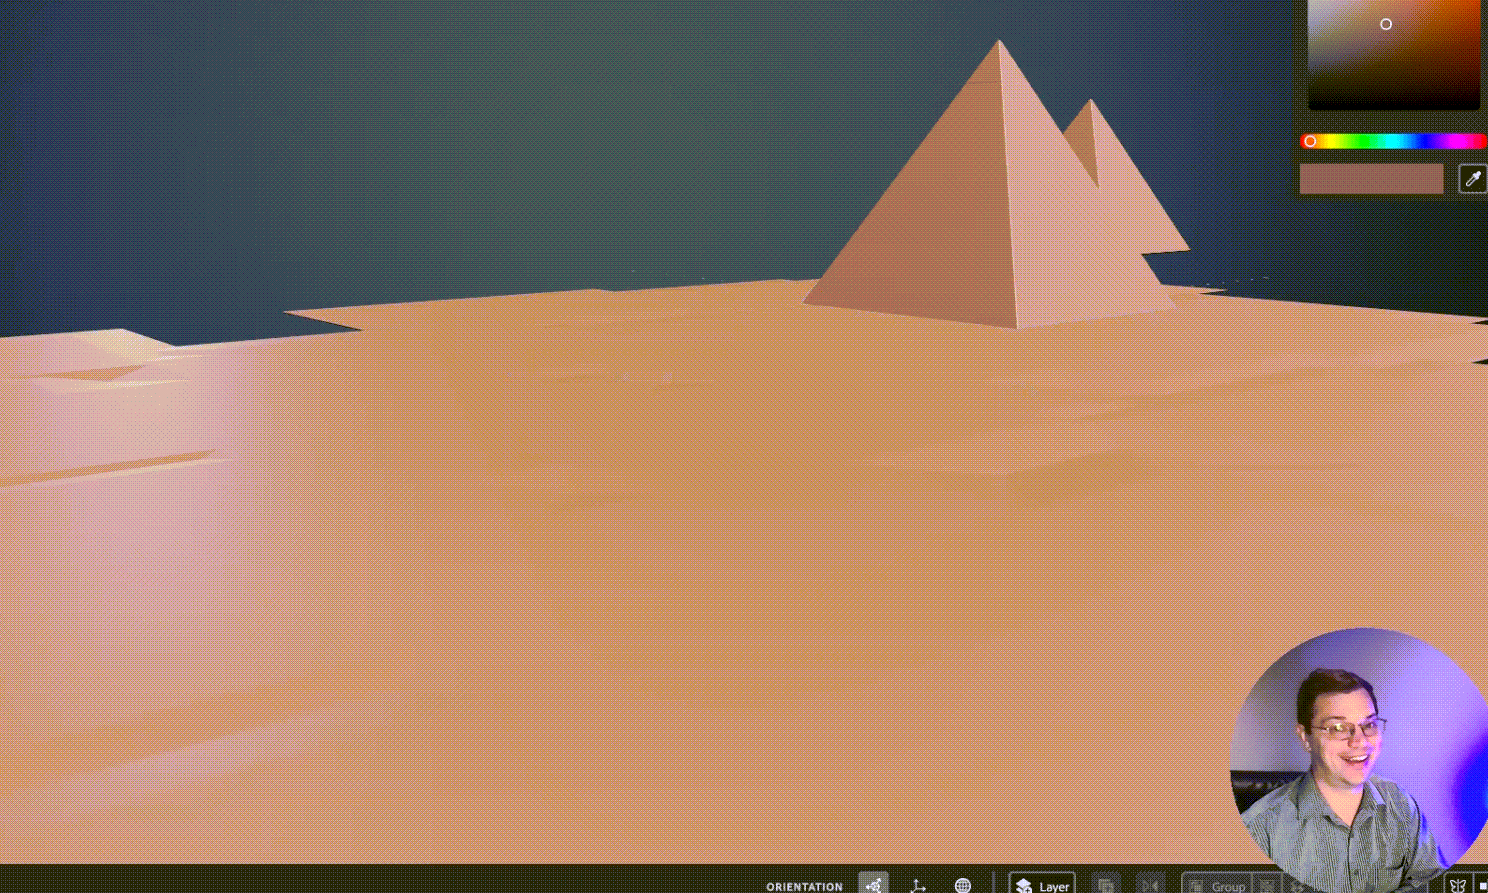
Today I continued work on the 2D Diorama that I started yesterday.
I still feel a bit like a fish out of water… or more like a one-legged penguin running in the Amazon, but I am moving forward and making more valuable mistakes. (moments of learning.)
Animated Gifs
Here are a couple animated gifs of today’s progress.
Videos
Here are videos of the process in order of completion.
A 2D diorama builds over several days in the virtual 3D space. Here is what I came up with from day 1.
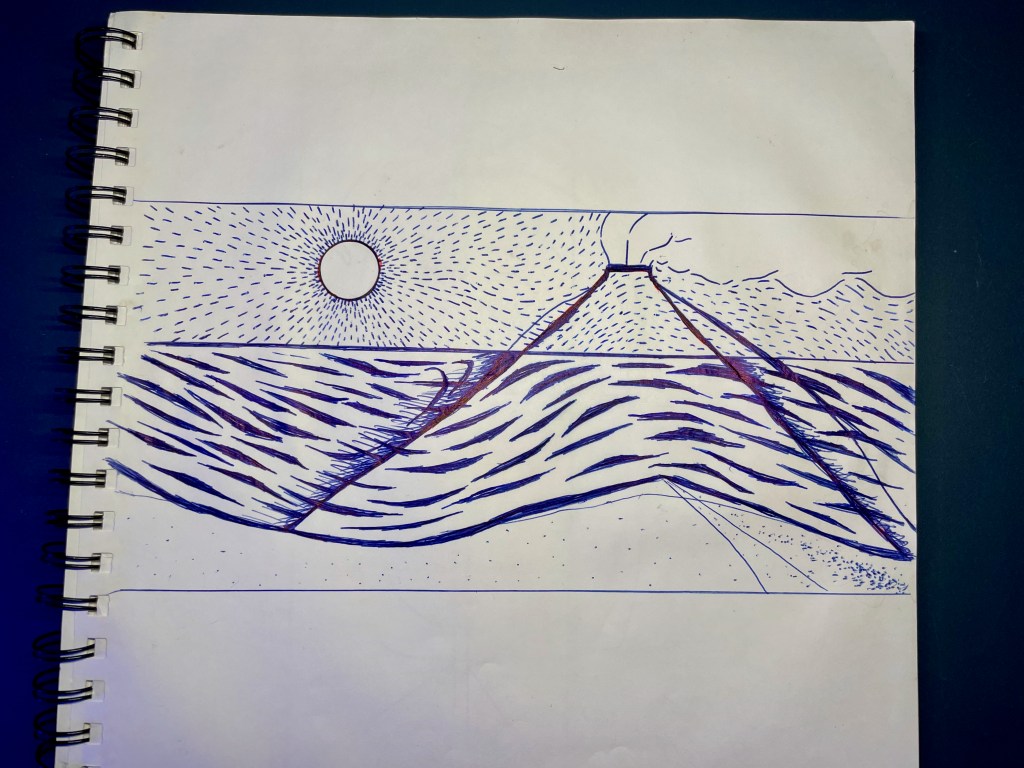
Here is an image of the pen drawing I reference in the VLOG video. I made a painting from this once but it didn’t capture the currents in the water and the air like designed. I am hoping to catch that more here.
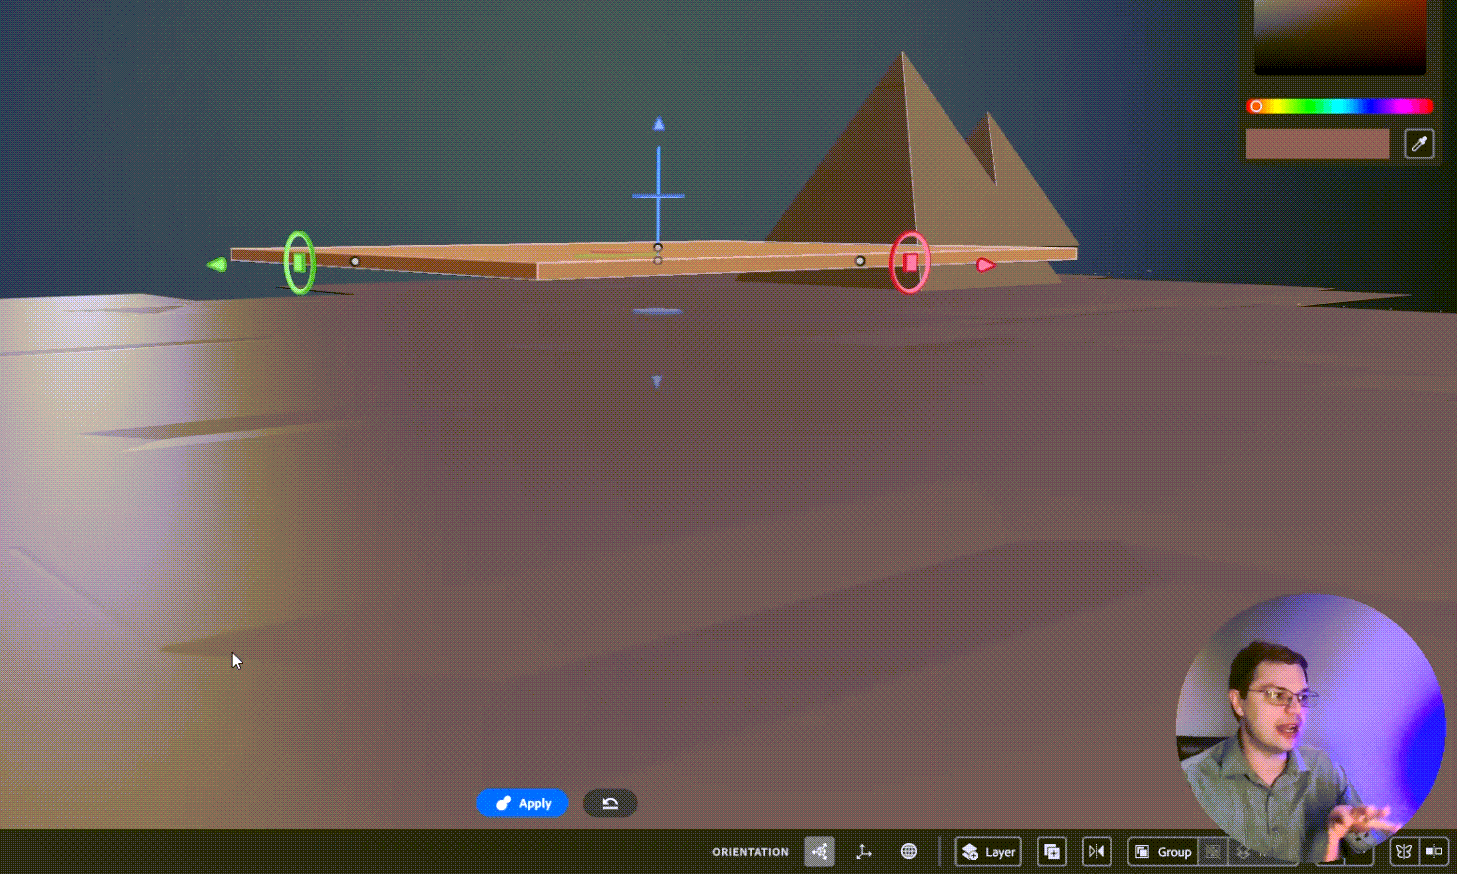
In the first video, I set up some blank plates that I plan to use to create my Diorama.
In retrospect, it might have been better to set each plane on a unique layer per the Boolean intersect issues I had in the second video. Or, I just don’t really understand how those Boolean intersects yet. (Bahoolian!)
In the second video, you can taste my pain as I struggle with getting the Boolean to intersect not delete my entire piece. I also need help with camera placement and zooming in on my work. In other words, if you want to skip a video this is the one to skip! See the pink triangle!? That’s how you know it’s the Boolean Intersect action.
In the final video, I get the background and mountain plate set.
Today we are looking at expectations when exporting out of Adobe Substance 3D Modeler. After you have a raw sculpt you are going to want to add texture, paint or somehow render the 3D form. I have a feeling this will start to answer my question about resolution and scale. If you have to export to a mesh to use a 3D form in Painter, then that is like rendering a vector file in Illustrator to more of a finalized file, like a PNG or JPG. These are my thoughts at this point and they are on the table for discussion.
Either way, this is Adobe so, as you can imagine, there are a ton of export options.
How to Export
This is the last video from the Basics series on Adobe Substance Modeler.
Output
Export Units Used
This is the same as importing. Currently, you go to the File drop-down and select “Export”, or (Ctrl+Shift+E).
Export Format
There is a long list of files you can export to:
FBX
GLB
GLTF
OBJ
USD
USDA
USDZ
USDC
I am curious about which of these files works better for what purpose or for which other programs. I suppose that will be a follow-up topic that I will discover later in my 30-Day+ 3D learning journey.
Export Units Used
Here is my answer to my scale question. When you export you can set Unite Scale. It looks like Modeler defaults to Meters currently and has many other measurement units. I wonder how specific you can be here.
Export Unit options:
Millimeters
Centimeters
Meters (default
Kilometers
Inches
Feet
Yards
Miles
Export Content
This is a nice option that will reduce a lot of duplicating and editing files.
Export Content options:
All Layers
Selected Layer
Topology
This function is a new concept to me but it really makes sense that you would need to choose how the surfaces are created.
Polygon Type
Raw Triangles – This will give you the densest polygon mesh. So this is a good place to start because this will help you retain the most resolution when rendering out to a usable file. The downside to this would most likely be larger file sizes as is the case with higher resolution.
Triangles and Quads – This Topology will allow you to select a target of the density of the polygons (poly count) on a slider.
UV-mapped Triangles – This option will give you a re-meshed output with automatic UVs.
Now I am going to be completely honest here and share that I wasn’t really clear on what UV-Mapped Triangles meant. I found some information on what a UV map is and it appears to be just a 2D representation of a 3D object. Like when you get a kit toy plane printed on a perforated card stock and you pop it out and fold it on the lines to build a 3-dimensional toy. Or another example of a UV Map would be this one of a true globe of Earth:
For a more relevant example of UV-Mapping, I found this tutorialon how to do this in Photoshop and Illustrator which really helped me wrap my head around this. (See what I did there? Wrapping a 2d image around a 3D space… eh? Wrap my head … anyway)
Hard Surface – better used for flat planes and sharp corners.
Organic – Better used for rounded edges, less rigid, amoeboid shape.
The video stated that the hard surfaces option really gives a better resolution than just the triangles option mentioned first at the top under Polygon Type.
Additional Options
Overall these are options that will be available or not depending on how you export. For example, you can export with instances normally, but you can not export with instances if you are using the UV-Mapped Triangle option as your Polygon Type.
Work Cited
I created these scenes directly after learning from this video
Today was all about what content can be imported into modeler and your options with each import type. For the most part, importing means that you are adding a pre-made item. Currently, items are imported on the desktop application using the File dropdown menu.
Import Scene
This option allows you to import other modeler scenes to your current modeler scene. Select File > Import Scene (or Ctrl + O), then you can click and open any *.smod file. This will bring all the content in the saved file and add it to the current file. Currently, you can also import files from Adobe Medium, but you have to select the drop-down to the right of the File Name on the bottom right of the scene open window.
Import Meshes
This topic was already discussed when we looked at stamps. Importing a mesh is another way of saying that you are importing a new stamp. (However, if you import the mesh as a stamp then you can use it more as a tool.) If you import the mesh in this way it appears to scale as an object called a “mesh”. Go to File > Import Mesh (Ctrl + Shift + M).
Mesh files accepted:
OBJ
FBX
USD
GLTF
Mesh files can not be edited with sculpting tools until they have been “Converted To Clay” in the actions menu. (Left Mouse Click)
Welcome to Day 8 of my 30-day 3D Design Challenge. Today I am looking at instancing and right away I can see how useful this function will be in 3D design. I was thinking and I can’t quite think of an equivalent to this in 2D design in Photoshop. We are truly entering into a uniquely 3D design element here.
You can create a single object and then create a link and mirror it. You can place it where you want and then when you alter it with a tool all the other “instances” of that object also change in the same way. So this is very similar to Semetry but the mirrored objects can be placed in arbitrary positions. If you think about it this really can only be done in the 3D environment.
Instancing also applies to groups. So you can create a group of objects or layers and then choose to make a link and then reproduce the group using instancing. Watch as I trip over my toes and listen as I stumble over my tongue!
Welcome to Day 7 of my 30-day 3D Design Challenge. I watched the instructional video on Symmetry and repetition two nights ago and I decided that the video begins adding too many steps for my understanding of the topic of Symmetry and Repetition. When the video jumped to adding symmetry and repetition at the layer level, then the multiple layers global, and then upped it to the group level I had a feeling that this is something I understand right now but someday soon I will be working in a project and get stuck or confused about what I am controlling. So, I have decided to break this topic into two parts. I covered Part 1 – Symmetry and Repetition on the layer level yesterday and Part 2 – Symmetry and Repetition on the multiple layer global level with nothing selected and also the group level on Day 07.
Now that I have completed day 07, I feel symmetry and repetition on the group level are not as confusing as I feared. The point is that:
There is no difference editing semetricly on multiple layers on the global level or having those layers grouped into a single layer.
The true benefit of having layers ungrouped is that you can select a specific layer and then modify that layer without affecting the other layers.
In the video I keep falling into “trainer mode” and then I realize I don’t know how to do this yet! I promise I’m not trying to man-splain…
Welcome to Day 6 of my 30-day 3D Design Challenge. I watched instructional video #7 in the list last night so that my subconscious mind could start generating ideas for today. What I decided is that the video quickly begins adding steps under the topic of Symmetry and Repetition. When the video jumped to adding symmetry and repetition at the layer level and then upped it to the global layer level just to switch over to the group level I had a feeling that “…this is something I understand right now but someday soon I will be working on a project and get stuck or confused about what I am controlling“. In other words, I felt a bit like I was peering into the 5th dimension for the first time. Maybe, this has to do with how the content was designed or how the video was created but it probably has more to do with my lack of experience with 3D design. So, I have decided to break this topic into two parts. I will cover
Day 6 – Part 1 – Symmetry and Repetition on the layer level and on Day 06
Day 7 – Part 2 – Symmetry and Repetition on the group level on Day 07
Part 1 – Symmetry and Repetition on the layer level
When the video starts the instructor explains where symmetry can be found at the bottom right of the screen and in the Actions menu when you right-click. What is interesting is that symmetry is set per layer but then it can also affect your design globally, at the scene level with nothing selected. I think this second part is why adding the group symmetry concept with this same video was just too much for me in a single lesson, but again I am a NOOB with this 3D design stuff, so I want to be very clear about that. It’s not the Adobe instructor, it’s me. I have kept the demonstration today in the 3 separate raw videos.
Video 1
Video 2
Video 3
Thanks so much for watching! Learning is not easy so thanks for the support!
Tools
Symmetry
Radial Symmetry
Repetition
Radial Repetition
David Kolmer
I generated this content after watching this amazing instructional video by Adobe:
The stamps live next to the primitives as a shape option for the clay tool and the erase tool.
Stamps can be in any shape! Also, Adobe Modeler comes with preinstalled stamps!
Check out what I came up with in the video, stay tuned below for more detailed step-by-step information on how stamps work.
Video of my creating
What are Stamps?
Stamps are based on meshes rather than the math of the primitives (essential tools for clay building) The outcome is that there are fewer options to change the Dynamics of the shape (like Taper, Fillet, Round, etc.) You can see above that Size is the only option to change the Dynamics of the stamp tool selected. Although, Single, pressure, and steady are still options which is a great thing.
There are two ways to make Stamps
First Way to Make a Stamp
You can make a stamp from a layer.
Select the layer
Right-mouse click to open the Actions menu.
Select the Stamp Icon
I want to point out that if you are working in VR the stamps in the tray are previewed in 3D. I just think that is amazing.
You can click on the create stamp icon anytime you are editing, because when you are editing you have a layer selected.
Second Way to Make a Stamp
You can import stamps as mesh files inside the app.
Modeler currently supports importing stamp meshes files in these formats:
OBJ
FBX
USD
GLTF
IMPORTANT: These files must be added through the app, you can not just dump them into the Window where MOdeler stores stamps. (Adobe > Adobe Substance 3D Modeler > Stamps)
Day 4 of my 3D Modeling 30-Day Challenge I have been wondering if Adobe 3D Modeler should be used for creating organic outdoor landscapes. It makes sense that this sort of scene would come up in the topic of “Resolution” because this file became very large very quickly.
In the video, I say that “I noticed resolution but it didn’t really click on what that was.” So, for the record: I know what resolution is and I should have brought more of my Adobe Photoshop knowledge to the table. What I meant to say was that it didn’t click how relevant or significant the resolution would be to file size. Then add to that the ramifications of delay to process certain morphs, smoothing, or the simple act of saving or opening the file.
I timed opening the file at 17 seconds but I noticed I missed 2 seconds in the beginning so it was probably an actual 15. Then I lowered the resolution, saved, and timed reopening the file. I lowered the resolution so low that the ground was actually damaged and had holes in it. So, too far! but the open time went down to 4 seconds with an actual of probably 1 or 2 seconds. So definitely improved the file-open time with a lower resolution.
Day 04 Resolution – 3D Model 30-Day ChallengeDavid Kolmer is an Instructional Designer and facilitator who does not know how to design in 3D. His goal in this rough cut series is to change that and be able to make a logo in 3D for his brand.
In my last two posts, Consistency and What Does Consistency Mean to You? I delved into who I am and what I am doing to improve myself. It was rather lavishly selfish and self-serving. I apologize for that. I will take ownership of both of those posts and admit they were not serving my readers in ways I am super proud of. At the same time, I will not delete them. That’s where I was at that time, I needed that, and I also need to own them. I was working on personal improvements that maybe don’t belong on a professional Learning and Development blog, or maybe they do. I guess that’s the good thing about blogs, it kind of doesn’t matter.
I was thinking about this last week as I sat watching my son dig through his swim lesson at the local YMCA. I saw him working on lifting his head gracefully to take a breath in a way that was anything but graceful. He was lifting his mouth far above the water and taking giant gulps of air through his mouth open wide. It was cartoonish. Anyone else watching would have seen a child who doesn’t know how to take a breath during freestyle.
However, that was my child, and I talk to him frequently. When we ride in the van to school, as I tuck him in at night, when we sit in the backyard breaking sticks. I know he is working hard on taking a good breath during the freestyle. I know how long it has been since he could not take a breath to the side instead of raising his head in the front. I know this is a challenge for him. I know this is a big goal of his. I know about the personal work he has done alone and with me at the pool to improve his swimming strokes. I know his work on diving to the bottom, practicing holding his breath, and getting his goggles just right. I see the personal work that he has had to do to be able to swim as well as he can now. We have discussed the excitement and fear he has related to deep diving.
When I shared my last two posts I was sharing my personal work. The things I was doing for me to make my overall performance more effective. Nobody really cared, I didn’t get comments on Linked In, and sadly enough I noticed that, and it meant something to me. Then I stopped posting. The truth is maybe somebody did read that and got something out of it. I was making it about me, about people responding to me. It shouldn’t matter if nobody responds. Ideally, I shouldn’t care how many people read.
Better Writing
During the summer months, I mow my own lawn. I normally listen to Music and Podcasts but I have pockets when I choose Audiobooks. Back in February of 2021, I listened to a condensed version of This book will teach you how to write better by Neville Medhora and it answered questions I didn’t know I had.
I can summarize this in two sentences:
People care about themselves, people do not care about you.
People respond to what his new novel or helpful.
As an Instructional Designer, or in this case a writer of learning content, these statements hit home for me. I stopped the lawnmower, pulled out my phone, and typed these nuggets into my notes app. After some consideration and revising this post before publishing, I realized that I am pulling from that moment subconsciously, so I should share why I feel the way I do here. These statements aren’t groundbreaking, and in a way they are a bit obvious, but having them as a guide as a learning content writer who does not consider himself a naturally gifted writer, was very helpful.
Internal Wins
Stephen Covey first published the 7 Habits of Highly Effective People in August of 1989, and I first read it nearly 29 years later in 2018. I am basing this observation off of the 7 Habits. The first half of the list is internal wins or “Private Habits”:
Sharpen the Saw, find a balance between work and relaxation
Be Proactive, take charge, and assume responsibility for your life
Begin with the end in mind, Have a vision for the future to make your ideas reality
These three internal wins get you ready for the transition to external wins #4 to Put things first and focus on what’s important. After that is when the internal wins start to support your external wins, wins that others can observe. Once you have implemented the first 4 into your life then you are ready to move on to:
Think Win-Win, find a solution that is profitable for everyone.
Seek first to understand, then to be understood, first really listen, then make recommendations.
Synergize, together you are stronger than alone.
So, sharing my internal wins, or new “Private Habits”, candidly was meant to show what I was working on and how I was improving myself. However, those wins are for me, those are mine, and I can’t really expect other people to be excited about them like I am. After all, People don’t care about me. Do I still bring up my Spindrift carbonated water with lemon juice and my intermittent fasting to strangers at my daughter’s dance practice? Well, yeah, I still do, and I maybe need to work on that if that is over-sharing; but for here, on this channel, this blog, I am going to pause and pivot. I am not going to consistently tell you about how consistent I am in my diet, work, or sleep patterns and expect you to be happy for me.
The truth is, nobody liked the post much on LinkedIn or Facebook, but I just checked the stats on WordPress, because I was curious, and that post had more views than any of my other recent posts in some time, and I even got some likes on Worpress itself, which I’m not sure I have ever had. So, I am back to square one with Dr. Socrates. I now know that I definitely don’t know sh^t. I need to stop overthinking this, (and maybe rebuild parts of my 4th wall.) Overthinking is not a new pitfall for me. Unfortunately, Analysis Paralysis is kind of my jam and I need to shed that like last year’s skin. Maybe that is what this BLOG is about.
I am going to post consistently, for you (and for me). I’m not going to overthink what I post, I’m just going to keep posting consistently. oh, yeah, and I’m going to keep breathing, probably not drinking alcohol, eating right, and working out HARD 3 times a week, (but I’ll try to keep that more to myself moving forward.)
Work Cited
Covey, Stephen R. The 7 Habits of Highly Effective People: Restoring the Character Ethic. [Rev. ed.]. Free Press, 2004.
Medhora, Neville. This book will teach you how to write better. [1st ed.]. Neville Medohora, 2013.
About the Author
David Kolmer is a learning professional who currently works and lives in St. Louis, MO. He does not have a degree in nutrition but does hold a Bachelor of Arts in Theater Arts and a Master of Arts in Instructional Design and Educational Technology.