In this video, I discuss how I am refining my approach to being consistent. I am no longer focused on consistently posting on my blog daily but instead consistently minding my priorities and waiting until I have time to create a higher-quality post.
Back to the Basics
I am glad I decided to backpedal from trying to export Adobe Substance Modler files into Adobe Substance Painter and just focus on getting better at Modeler. I like how this more advanced tutorial made use of the boolean functionality, symmetry, and repetition. This video also showed some simple yet creative ways to quickly create dynamic shapes only using the clay and erase tool.
When it feels like you are getting nowhere and are not getting the results you want, you need to look for the things that are working out. You can pause, reevaluate your given circumstances, and tweak your approach.
Over the past three posts, I have been staring at a brick wall. Some Adobe Substance Painter introduction videos caught my eye and I thought I’d like to learn how to work with that application next. However, I have had some issues finding a way to export a file from Adobe Modeler to Adobe Painter. I have read content and watched videos that suggest you should be able to do that, but I just can’t seem to get it to work.
Focus on What is Working
Identify the positive results that you have had and then focus on those.
So, as I was viewing the files that I exported from Adobe Substance Modler (OBJ, FBX) I noticed that those files were associated with Adobe Substance Stager. Sure enough, when I double-clicked on them they opened in Adobe Stager. The Ocean Volcano Diorama I built came up small and that discouraged me. However, I took a breath paused, and stepped away and when I went to bed last night I asked myself what could my next step be. When I woke up the answer was provided by my subconscious. Look at what you can do in Stager because that is where your files are working. In addition to that I had another idea. I have by no means mastered working in Adobe Substance Modeler and I enjoy working in that. So after I look at how things are opening in Stager and get comfortable with how layers carry over, I could go back and do more advanced builds in Adobe Substance Modeler.
I feel like this second option is my path with heart.
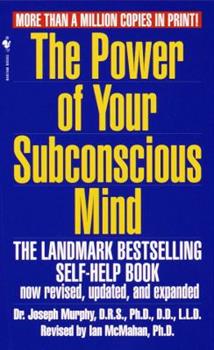
I read this series at a formative time in my life and it had a big impact on how I view learning and knowledge in general. There is a very big emphasis in these books on finding the path with heart or choosing the path that will best serve you. In other words, be clear about what you want to accomplish and then give it your all. Yesterday I made fun of Using the Power of Your Subconscious mind because it sounds like a Pseudoscience book that tells you to take drugs and align your Chakras. (I have nothing against the concept of Chakras, I can do a separate post on those if there is any interest in that.) At any rate, my point is that this book (The Don Juan one) IS about Carlos Castenada’s experiences consuming hallucinogenic Peyote cacti in the deserts of Central America. So, as much as I like these books and enjoy the teachings and perspectives they provide, they are not far from new-age pseudoscience.
Now, for the record I never ate Payote, nor have I taken any mescaline, but the author, Carlos Castaneda did. According to the books, he also drove his car to Central America and spent time with the Brujo, Native American Shamans, or Sorcerers. He spent a good deal of time recording their practices. Although many criticize the books for not being true anthropology, they are still a very interesting read and provide colorful insight into the perspectives and traditions of that part of the world.
OK, so back to why I brought that book up at all. A person of knowledge will follow the path with heart. They will pursue what interests them above all other things. A person of knowledge understands that people don’t learn from hearing other people explain something. If you want to learn about something there is no replacement for first-hand experience. Do you see what I did there? I took some crazy new-age hippy novel written by a charming man who was on cactus, mushrooms, and all sorts of trippy datura roots and I made this about learning, I made it about how to improve yourself. Get out there and try something new. I am not recommending drugs, I am recommending experiences. (Not necessarily drug-related experiences.)
Day 15 – Exporting to Adobe Paint Confusion Continues
Learning is complex and painful, learning is a succession of failures where you do not give up and lose motivation but consistently overcome the setbacks and find ways to improve. I am confident that I will remain consistent in my 30-day 3D modeling challenge and that I will find a way to export 3D models from Adobe Modeler to Adobe Painter.
In today’s video, I share how I have been using the Headway app on my iPhone to listen to condensed versions of books. I have mentioned this app before on this blog. I do not receive any monetary incentives to mention this app and I am not sponsored by them in any way. The app costs around $40 a year and you can purchase a few years for a discount.
I talk about how the app fed me a suggestion to read The Power of Your Subconscious Mind. I like to talk about this book because I like to use the practices it teaches. This sounds like a new-age pseudo-science book that will tell you to take drugs and align your chakras. In fact, it is a book from the 60s that is based on Christian thought and explains how to tap into the power of your subconscious. I am not a huge fan of organized religion, but this book distills what I like about faith-based systems.
The trick is to ask yourself questions about your most pressing conflicts or confusions right before you go to bed. Then when you go to sleep your subconscious mind will attempt to solve the issues for you.
This morning I woke up and thought, wait what about the option that exports as a “Raw Mesh” in Adobe Substance Modler!? Maybe that would create an OBJ file that will open up in Adobe Substance Painter!
You can watch the video to see how I painfully discover that this solution didn’t do the trick. I am still doing something wrong, but this practice did give me something else to try and that was a step in the right direction.
I had some serious moments of learning today on St’ Pattie’s Day. I try to blame Leprechauns in the video but I think it just came down to User Error here! Luckily OneDrive had backups of my work. I went and dug deep. Those Leprechauns can’t impede my learning journey! Still, then none of the export formats on Adobe Modeler show up in Adobe Painter when I go to open the file!? I am Only seeing a *.toc and *.spp. as supported files to open.
After recording, I realized I needed to look at how to import it into Adobe Painter. There might be a solution there. That might have to be my work for tomorrow!
Work Cited
I created this content of confusion after watching this amazing instructional video by Adobe.
Today I continued work on the 2D Diorama that I started yesterday.
I still feel a bit like a fish out of water… or more like a one-legged penguin running in the Amazon, but I am moving forward and making more valuable mistakes. (moments of learning.)
Animated Gifs
Here are a couple animated gifs of today’s progress.
Videos
Here are videos of the process in order of completion.
A 2D diorama builds over several days in the virtual 3D space. Here is what I came up with from day 1.
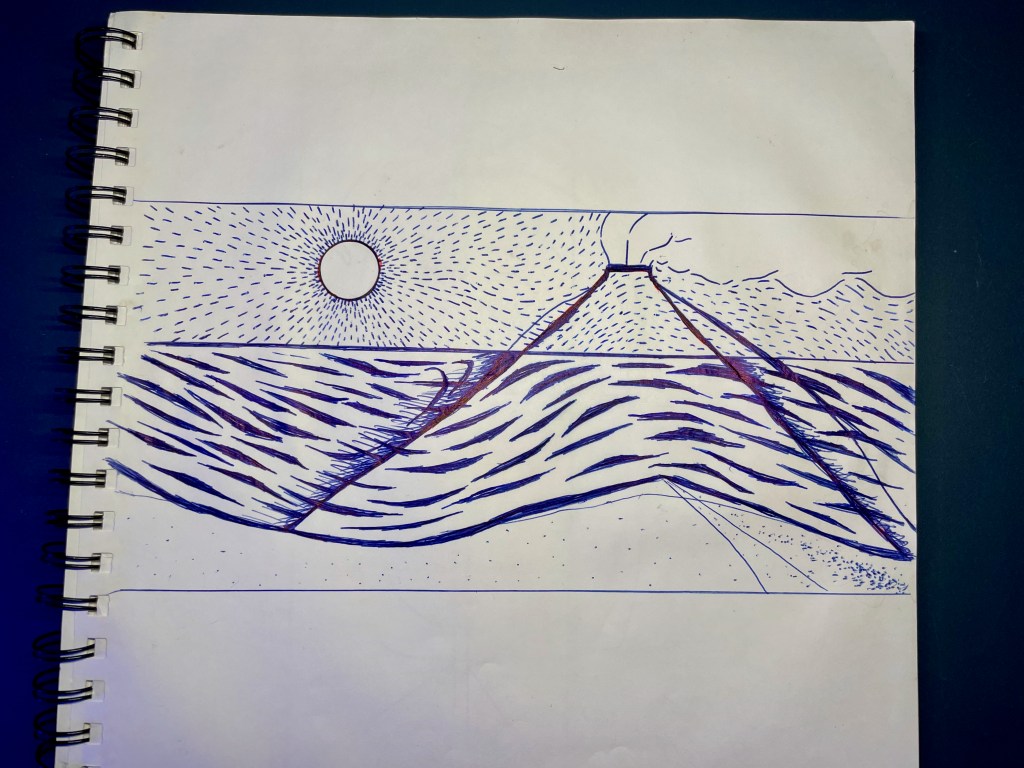
Here is an image of the pen drawing I reference in the VLOG video. I made a painting from this once but it didn’t capture the currents in the water and the air like designed. I am hoping to catch that more here.
In the first video, I set up some blank plates that I plan to use to create my Diorama.
In retrospect, it might have been better to set each plane on a unique layer per the Boolean intersect issues I had in the second video. Or, I just don’t really understand how those Boolean intersects yet. (Bahoolian!)
In the second video, you can taste my pain as I struggle with getting the Boolean to intersect not delete my entire piece. I also need help with camera placement and zooming in on my work. In other words, if you want to skip a video this is the one to skip! See the pink triangle!? That’s how you know it’s the Boolean Intersect action.
In the final video, I get the background and mountain plate set.
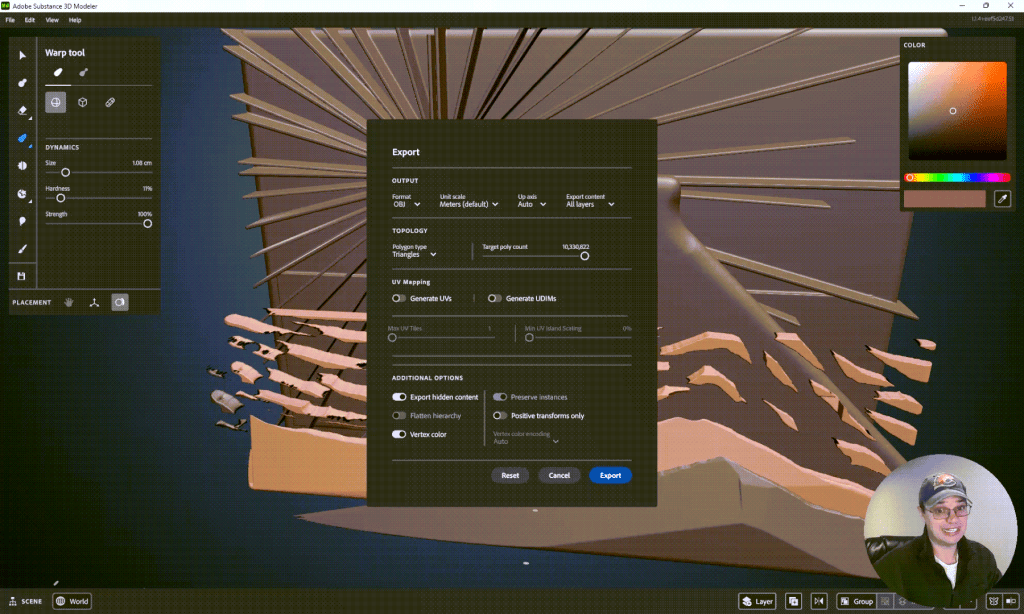
Today we are looking at expectations when exporting out of Adobe Substance 3D Modeler. After you have a raw sculpt you are going to want to add texture, paint or somehow render the 3D form. I have a feeling this will start to answer my question about resolution and scale. If you have to export to a mesh to use a 3D form in Painter, then that is like rendering a vector file in Illustrator to more of a finalized file, like a PNG or JPG. These are my thoughts at this point and they are on the table for discussion.
Either way, this is Adobe so, as you can imagine, there are a ton of export options.
How to Export
This is the last video from the Basics series on Adobe Substance Modeler.
Output
Export Units Used
This is the same as importing. Currently, you go to the File drop-down and select “Export”, or (Ctrl+Shift+E).
Export Format
There is a long list of files you can export to:
FBX
GLB
GLTF
OBJ
USD
USDA
USDZ
USDC
I am curious about which of these files works better for what purpose or for which other programs. I suppose that will be a follow-up topic that I will discover later in my 30-Day+ 3D learning journey.
Export Units Used
Here is my answer to my scale question. When you export you can set Unite Scale. It looks like Modeler defaults to Meters currently and has many other measurement units. I wonder how specific you can be here.
Export Unit options:
Millimeters
Centimeters
Meters (default
Kilometers
Inches
Feet
Yards
Miles
Export Content
This is a nice option that will reduce a lot of duplicating and editing files.
Export Content options:
All Layers
Selected Layer
Topology
This function is a new concept to me but it really makes sense that you would need to choose how the surfaces are created.
Polygon Type
Raw Triangles – This will give you the densest polygon mesh. So this is a good place to start because this will help you retain the most resolution when rendering out to a usable file. The downside to this would most likely be larger file sizes as is the case with higher resolution.
Triangles and Quads – This Topology will allow you to select a target of the density of the polygons (poly count) on a slider.
UV-mapped Triangles – This option will give you a re-meshed output with automatic UVs.
Now I am going to be completely honest here and share that I wasn’t really clear on what UV-Mapped Triangles meant. I found some information on what a UV map is and it appears to be just a 2D representation of a 3D object. Like when you get a kit toy plane printed on a perforated card stock and you pop it out and fold it on the lines to build a 3-dimensional toy. Or another example of a UV Map would be this one of a true globe of Earth:
For a more relevant example of UV-Mapping, I found this tutorialon how to do this in Photoshop and Illustrator which really helped me wrap my head around this. (See what I did there? Wrapping a 2d image around a 3D space… eh? Wrap my head … anyway)
Hard Surface – better used for flat planes and sharp corners.
Organic – Better used for rounded edges, less rigid, amoeboid shape.
The video stated that the hard surfaces option really gives a better resolution than just the triangles option mentioned first at the top under Polygon Type.
Additional Options
Overall these are options that will be available or not depending on how you export. For example, you can export with instances normally, but you can not export with instances if you are using the UV-Mapped Triangle option as your Polygon Type.
Work Cited
I created these scenes directly after learning from this video
Today was all about what content can be imported into modeler and your options with each import type. For the most part, importing means that you are adding a pre-made item. Currently, items are imported on the desktop application using the File dropdown menu.
Import Scene
This option allows you to import other modeler scenes to your current modeler scene. Select File > Import Scene (or Ctrl + O), then you can click and open any *.smod file. This will bring all the content in the saved file and add it to the current file. Currently, you can also import files from Adobe Medium, but you have to select the drop-down to the right of the File Name on the bottom right of the scene open window.
Import Meshes
This topic was already discussed when we looked at stamps. Importing a mesh is another way of saying that you are importing a new stamp. (However, if you import the mesh as a stamp then you can use it more as a tool.) If you import the mesh in this way it appears to scale as an object called a “mesh”. Go to File > Import Mesh (Ctrl + Shift + M).
Mesh files accepted:
OBJ
FBX
USD
GLTF
Mesh files can not be edited with sculpting tools until they have been “Converted To Clay” in the actions menu. (Left Mouse Click)
Welcome to Day 8 of my 30-day 3D Design Challenge. Today I am looking at Booleans, defined in computer science as a series of code selected to execute, or not execute, depending on a true-false response. (Or that’s what I gathered from a quick Google Search!)
Show me the Booleans!
Boolean functions can be found in the Actions menu. (right click)
The video states that there are three boolean options (above) that can be applied to anything that can be selected. However, as of March 2023, I show 4 Boolean options in my version of Substance Modeler (below).
The 4 Boolean options from left to right are:
Subtract mode for selection
Intersect mode for selection
Split
Union Mode
Welcome to Booleans!
1. Boolean – Subtract
Uses the Boolean object to cut away from the target object. This is also called “Difference”.
2. Boolean – Intersect
Used to delete everything except where the boolean object and target overlap.
3. Boolean – Split
Used to split the target object into separate objects based on the boolean object’s surface.
4. Boolean – Union
Used to combine two objects – In the video, this is called “Add” or “Addition”.
For this topic, I used the Adobe Homepage to help define and instruct me on Booleans in Adboe Stubstance Modeler 3D.
Welcome to Day 7 of my 30-day 3D Design Challenge. I watched the instructional video on Symmetry and repetition two nights ago and I decided that the video begins adding too many steps for my understanding of the topic of Symmetry and Repetition. When the video jumped to adding symmetry and repetition at the layer level, then the multiple layers global, and then upped it to the group level I had a feeling that this is something I understand right now but someday soon I will be working in a project and get stuck or confused about what I am controlling. So, I have decided to break this topic into two parts. I covered Part 1 – Symmetry and Repetition on the layer level yesterday and Part 2 – Symmetry and Repetition on the multiple layer global level with nothing selected and also the group level on Day 07.
Now that I have completed day 07, I feel symmetry and repetition on the group level are not as confusing as I feared. The point is that:
There is no difference editing semetricly on multiple layers on the global level or having those layers grouped into a single layer.
The true benefit of having layers ungrouped is that you can select a specific layer and then modify that layer without affecting the other layers.
In the video I keep falling into “trainer mode” and then I realize I don’t know how to do this yet! I promise I’m not trying to man-splain…