30-Day 3D Model Challenge 6/30

Welcome to Day 6 of my 30-day 3D Design Challenge. I watched instructional video #7 in the list last night so that my subconscious mind could start generating ideas for today. What I decided is that the video quickly begins adding steps under the topic of Symmetry and Repetition. When the video jumped to adding symmetry and repetition at the layer level and then upped it to the global layer level just to switch over to the group level I had a feeling that “…this is something I understand right now but someday soon I will be working on a project and get stuck or confused about what I am controlling“. In other words, I felt a bit like I was peering into the 5th dimension for the first time. Maybe, this has to do with how the content was designed or how the video was created but it probably has more to do with my lack of experience with 3D design. So, I have decided to break this topic into two parts. I will cover 

  • Day 6 – Part 1 – Symmetry and Repetition on the layer level and on Day 06 
  • Day 7 – Part 2 – Symmetry and Repetition on the group level on Day 07

Part 1 –  Symmetry and Repetition on the layer level 

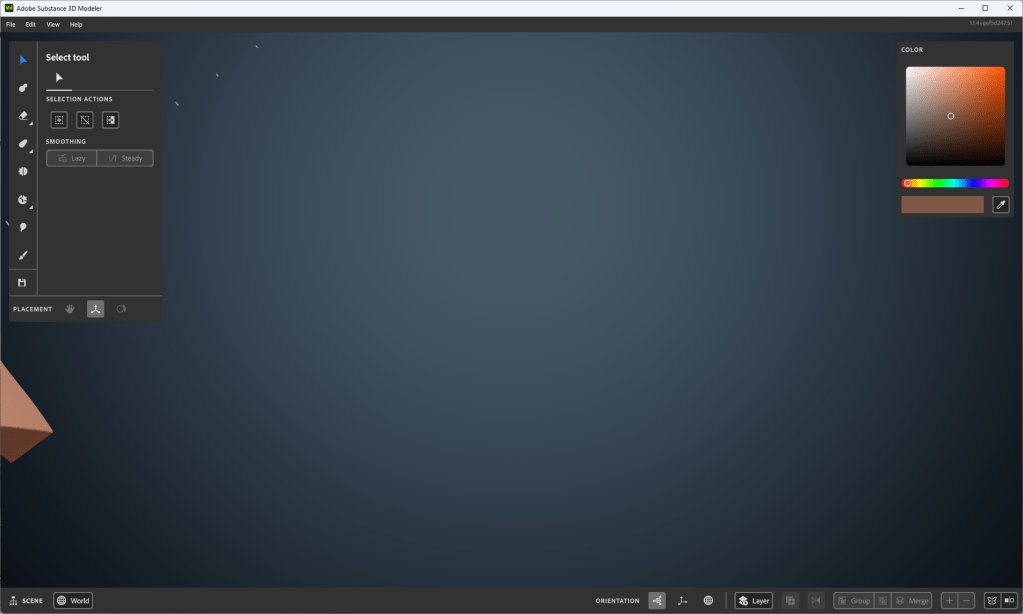
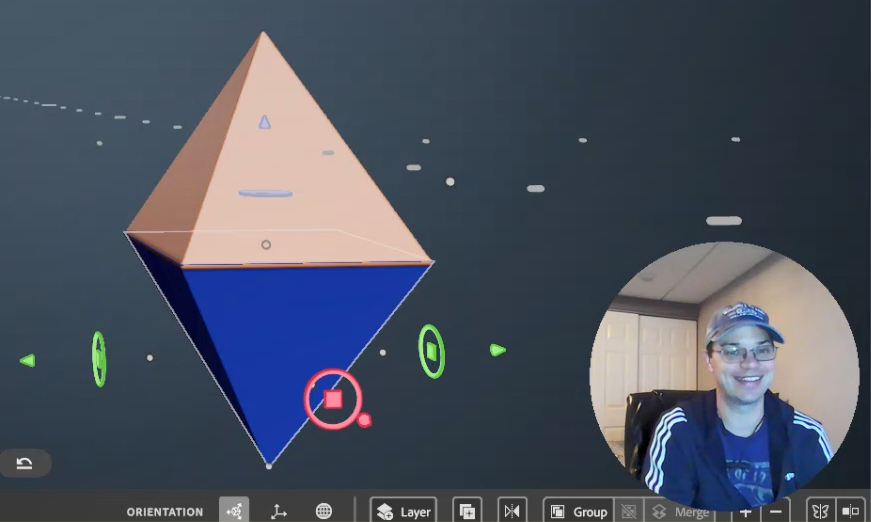
When the video starts the instructor explains where symmetry can be found at the bottom right of the screen and in the Actions menu when you right-click. What is interesting is that symmetry is set per layer but then it can also affect your design globally, at the scene level with nothing selected. I think this second part is why adding the group symmetry concept with this same video was just too much for me in a single lesson, but again I am a NOOB with this 3D design stuff, so I want to be very clear about that. It’s not the Adobe instructor, it’s me. I have kept the demonstration today in the 3 separate raw videos.

Video 1

Video 2

Video 3

Thanks so much for watching!
Learning is not easy so thanks for the support!

Tools 

Symmetry

Radial Symmetry

Repetition

Radial Repetition

I generated this content after watching this amazing instructional video by Adobe:

First Steps with Substance 3D Modeler – 07 Symmetry and Repetition

On the First Steps with Substance 3D Modeler Playlist

30-Day 3D Model Challenge 5/30

Stamps

How to use them and how to make your own

The stamps live next to the primitives as a shape option for the clay tool and the erase tool.

Stamps can be in any shape!
Also, Adobe Modeler comes with preinstalled stamps!

Check out what I came up with in the video, stay tuned below for more detailed step-by-step information on how stamps work.

Video of my creating

What are Stamps?

Stamps are based on meshes rather than the math of the primitives (essential tools for clay building) The outcome is that there are fewer options to change the Dynamics of the shape (like Taper, Fillet, Round, etc.) You can see above that Size is the only option to change the Dynamics of the stamp tool selected. Although, Single, pressure, and steady are still options which is a great thing.

There are two ways to make Stamps

First Way to Make a Stamp 

You can make a stamp from a layer.

  1. Select the layer
  2. Right-mouse click to open the Actions menu.
  3. Select the Stamp Icon  

I want to point out that if you are working in VR the stamps in the tray are previewed in 3D. I just think that is amazing.

You can click on the create stamp icon anytime you are editing, because when you are editing you have a layer selected.

Second Way to Make a Stamp 

You can import stamps as mesh files inside the app.

Modeler currently supports importing stamp meshes files in these formats:

  • OBJ
  • FBX
  • USD
  • GLTF

IMPORTANT: These files must be added through the app, you can not just dump them into the Window where MOdeler stores stamps. (Adobe > Adobe Substance 3D Modeler > Stamps)

Add a stamp file here instead:

Today I viewed The 6th video on Stamps from the Substance 3D Modeler – Desktop Playlist on YouTube.

Up Next

I am so very excited about the next topic Symmetry and Repetition!
See you tomorrow for Day 6!

Work Cited

Bishop, Gary John. UNFU*k Yourself – Get out of Your Head and into Your Life. Harper Collins Usa, 2017.

30-Day 3D Model Challenge 2/30

On day 2, I worked on creating items in layers. I also learned about grouping objects together and moving them as a group.

Image of a room with 3 doors, a sofa, and an oval coffee table.

First, I started by re-watching the first two videos in the Substance 3D Modeler – Desktop First Steps with Substance 3D Modeler playlist on YouTube.com.

I rebuilt the basic shapes from those tutorials as a review of day 1.

I am having an issue with zooming in on a single object and getting too close. Then when I zoom away the work that I have created is out of view. I try to tap the “R” key twice like it said in the first tutorial but it doesn’t always seem to reset the scene. The workaround I have found for now is to save and reopen the project. I show this at the end of the video below.

Image of my workspace where I can’t seem to focus back on the object I’m creating

While trying to solve this problem I saw this fantastic page that shows all the key commands used for Adobe Substance 3D Modeler, which is super helpful. Thanks, Adobe! You rock!

At lunch today I viewed tutorial Video #3 from the free Adobe Tutorials on at least Adober Substance Modeler. I say in the video that I picked a scene of a room from a house because of my theater, instructional design, or house rehab background; but it is just as likely that I have been learning Multi-Craft (later iteration of Minecraft) with my son. I also made an attempt to improve the lighting in my room for this recording. Here is what I came up with from day 2:

30-Day 3D Model Challenge

I don’t know how to build models in the 3D space

I am going to teach myself how to create 3D objects in the virtual space. I don’t know how to use Adobe Substance Modeler, Adobe Substance Painter, or Adobe Substance Designer, nor do I know how to use Adobe Substance Stager. I am going to spend the next 30 days taking the free Adobe Tutorials on at least Adober Substance Modeler and sharing my experience here. We will see how it goes!

Upon taking some preliminary video courses I have learned that this can lead to designing in Virtual Reality and Augmented reality and I want to be very clear that, this is my ultimate goal. For now, I want to build a logo for my brand and I am thinking that the 3D space might be easier than Illustrator. I have some basic designs in Illustrator and they look well… flat.

So far I have been working in Adobe Illustrator which to be fair I have not used in over a decade. I like it, it is very powerful. HUGE shout out to my buddy Luke Lindberg who has been holding my hand through this process. You are the man Luke. If you need a graphic designer, then hit him up!

But I Want it to Animate Someday!

Enter Adobe Substance Suite

What I love about living in 2023 is that if you want to learn something new chances are the platform that makes the product you want to learn is producing high-quality learning content and sharing it on Youtube for free! HOT JAMS! Just look at this, 10 fresh clean learning artifacts that walk me through the process. I would be mad to not take advantage of this! Adobe Tutorials
https://youtube.com/playlist?list=PLB0wXHrWAmCwrvuebNKHc7rooXkkVDwln

So, I am jumping in, I am teaching myself something I know nothing about. So let’s look at what I came up with. You can tell by the concerned look on my face in the next video! This is not the face of a man who knows what he is doing. This is the face of a man who is vulnerable and swimming in waters he does not know.

After Working with the First 3D Substance Modeler Tutorial #1

So, to be candid. I created something and it didn’t work because I was just messing around with the shape of the brush and not actually creating something. Then when I went to reopen the file there was nothing there because I didn’t create anything. So I actually created this after watching the second tutorial but it relates to the first tutorial so I will share it first.

After working with https://youtu.be/jsurumsFjbQ

In this tutorial, it became clear how to use the creation “gizmo” or “brush”. You can press the “e” key to set it to a transparent object for erasing. Or you can press the “c” key to create in clay. I am still not clear on what pressing the “c” key does. It sort of bakes the clay and then you can’t erase what you have already done. I really dug in here and created many layers to get an idea of what the limits were.

After working with https://youtu.be/HkVReuxEpq4

I am really excited to enter this new space. Even if these aren’t the tools I eventually need to create VR and AR experiences learning these skills will be valuable when I do. I would like to thank the learning team at Adobe who put these learning playlists together. YouTube really is the best LMS on the planet Earth.

Links to This Series

30-Day 3D Model Challenge 1/30

30-Day 3D Model Challenge 2/30

30-Day 3D Model Challenge 3/30

30-Day 3D Model Challenge 4/30

30-Day 3D Model Challenge 5/30

30-Day 3D Model Challenge 6/30

30-Day 3D Model Challenge 7/30

30-Day 3D Model Challenge 8/30

30-Day 3D Model Challenge 9/30

30-Day 3D Model Challenge 10/30

30-Day 3D Model Challenge 11/30

30-Day 3D Model Challenge 12/30

30-Day 3D Model Challenge 13/30

30-Day 3D Model Challenge 14/30

30-Day 3D Model Challenge 15/30

30-Day 3D Model Challenge 16/30

30-Day 3D Model Challenge 17/30